
A layman's guide to Jekyll
,
Jekyll is really simple once you know how it works. You can make your blog do wonders once you know how to play with templates, layouts, loops and curly braces. Here is a layman’s Jekyll guide! Learn how to get started with Jekyll. Create yourself a clean, minimal and beautiful Jekyll blog.
Why learn Jekyll the right way?
When I had to make some changes in Jekyll, I used to write dirty codes in the respective template and somehow make it work for a while but if I wanted to make any further changes to it then I have to search for the code, see how it used to work, edit or add some more dirty code and make it work again. This is what I used to do years ago. Half knowledge is worse than no knowledge was completely true in my case.
- Why learn Jekyll the right way?
- How to use Jekyll?
- What Jekyll does better?
- Understand the structure of Jekyll
- Files inside a Jekyll site
- Folders inside a Jekyll site
These dirty codes would break my site, leading to undesirable results. Sometimes I wouldn’t know what exactly went wrong. I never used to add comments while committing the changes (big mistake). I can always revert back, but I would lose all the changes and posts :(
How to use Jekyll?
When I started using Jekyll, I used to get a lot of 404 errors, page build errors, liquid tag errors, page rendering errors and what not. The mistake I did was not spending a little time to know how Jekyll works. I was over enthusiastic may be. But it did hurt me in the long run.
If you are just starting off with Jekyll or you do not know how to use Jekyll then please start with the official documentation provided by Jekyll. This will set you on the right track. It has a lot of information (and a lot of pages as well). So I thought I would summarize it in this post so that anyone could make use of it for a basic Jekyll blog designing.
But once you finish reading this post, I suggest you check out the documentation. It will give you a rather deep insight than just a brief introduction like this one.
What Jekyll does better?
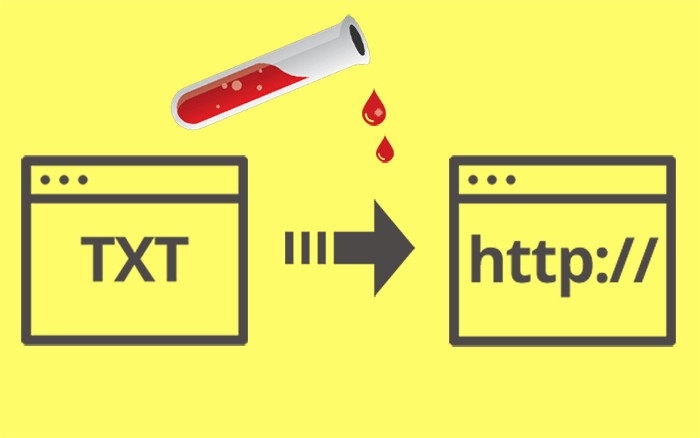
As depicted in the image(pardon my photoshop skills), Jekyll does magic on text files converting them into html files - which is technically called as “text transformation“. This is not the only thing Jekyll does. Jekyll actually does some more magic like templating, pagination, syntax highlighting, etc., And also, Jekyll posts and pages can be written in easily readable markups like markdown, textile (not supported anymore after Jekyll 3.0 update) etc.,
Understand the structure of Jekyll
Jekyll is simple if you understand what feature is for what purpose. Let us look at the folder structure of Jekyll. The below tree is taken directly from Jekyll documentation.
.
.
├── _config.yml
├── _drafts
|   ├── begin-with-the-crazy-ideas.textile
|   └── on-simplicity-in-technology.markdown
├── _includes
|   ├── footer.html
|   └── header.html
├── _layouts
|   ├── default.html
|   └── post.html
├── _posts
|   ├── 2007-10-29-why-every-programmer-should-play-nethack.textile
|   └── 2009-04-26-barcamp-boston-4-roundup.textile
├── _data
|   └── members.yml
├── _site
├── .jekyll-metadata
└── index.html
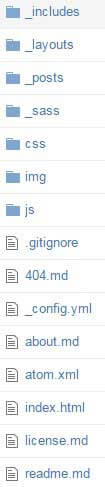
Keep this sample Jekyll repository tab open while reading the below points. You should be able to see the following files and folders.
Files inside a Jekyll site
1. _config.yml:
Master configuration file _config.yml is the DNA of a Jekyll project. You can define your site configurations inside this file. From simple things such as title, URL, author, pagination etc., to complex things such as SSL certificates, increments etc., can be defined inside this file.
Here is a sample _config.yml file for Emerald Jekyll theme. You can use all the parameters in this file using site variable. For instance, using {{ site.url }} anywhere on the page, post, template will fetch the url variable defined in _config.yml. Read More.
This is also the first file you should edit when you fork(copy) a new theme. In order to make your blog work, you should mention the baseurl. Read: How to create a Jekyll blog for more.
2. index.html:
This is your homepage in most cases. It can also be in the format index.md. It usually has a for loop to load all the posts. You can make changes to this file and design your index of posts like how I have done the card layout for my blog. Index file may also call default layout which will be inside _layout folder. You can also take the whole loop thing off and have a simple introduction page like how Jekyll official site has.
3. some.xml:
This file can be your post feeds or a sitemap. If you do not have one, you can always create a sitemap or a feeds file.
4. readme.md:
This is a file where you can describe your project. This will be rendered as a html file and displayed by default when someone visits your repository on Github. In the sample link I have provided above, see the page displayed. At the bottom of the repository, you will see a description of the theme with a screenshot. This file is not mandatory.
Folders inside a Jekyll site
1. _includes:
This folder is kind of like #include in C-programming. You can include files which are inside this folder into any post or page just by adding this line of code - {% include filename.html %} replace the filename to a file inside your _includes folder. Usually, header and footer files are put inside this folder and called inside default layout (or any page or post).
2. _layouts:
As the name says this folder contains your blog layouts. It will have default, page and post layout by default. You can also create other layouts such as two column, single column etc., There can also be a layout for redirecting, compressing etc.,. I will talk about these in a different post.
3. _posts:
All your blog posts reside here. The naming should be in the format YYYY-MM-DD-title.md.
4. _sass:
Jekyll supports Sass preprocessor. Sass files are included in this folder can be imported to main stylesheet.
5. _site:
This is a folder created by Jekyll to host your website. It will have files only compatible for a browser - HTML, CSS, JS, XML etc., This conversion happens by default. You don’t have to create this or edit anything inside this folder.
6. css, images, js:
You can create folders and name then as per your needs. These are some of the common folders used to keep stylesheets, images, and JavaScript files.
7. Other folders:
There can be other folders as well. The one used for plugins is _plugins. You can add a folder if you like. You can name it anything, say project and keep a html or a markdown file inside it. These files will get a URL http://yourdomain/project/filename.html.
I hope that gives you an insight into the structure of Jekyll files and folders. It looked strange for me in the beginning but once I understood the logic used behind, it all made sense. And since a Jekyll site is made up of a lot of different parts, debugging is very easy. When something starts acting up, you’ll know exactly where to look for. In this blog, I have written about a lot of things I did using Jekyll. Make use of it.
If you get frustrated about something that is not working then just ask the community. Google things with the suffix jekyll. You will find an answer. You can always ask me here, in the comment section. I will try my best to help you out.
Thanks for reading!
