
How to Create a Beautiful Jekyll Blog?
,
I created this beautiful looking Jekyll blog using default Jekyll template. You can also host your blog on github using Jekyll. Jekyll is a simple blog generator. Jekyll blogs creation is easy, simple and efficient. Learn how to create Jekyll blog.
Image credit: Jekyll
Jekyll is an open-source blogging platform written in Ruby by Tom Preston-Werner. Currently, Parker Moore is developing it.
- Reasons to use Jekyll
- Why not WordPress?
- Prerequisites
- Step 1: Find a theme that suits your requirement
- Step 2: Fork - A new way of copy pasting!
- Step 3: Check whether you are on the right branch
- Step 4: Check for redirection
- Step 5: Check for baseurl
- Step 6: Make changes to your website
- Step 7: Publish your new post!
- How to host a Jekyll blog on User Pages?
- Developing Jekyll Locally
- Conclusion
Jekyll being open-source - is free. It can be hosted on a Github repository - which is also free! Now compare this to a WordPress blog where you have to buy hosting. When my blogs were in WordPress, it used to cost me anywhere around $12 every month for hosting. Now that I’m using Jekyll and hosting it on Github, my expense is zero on hosting!
I had no control over WordPress design. I had to rely on the themes that are available. An SEO friendly theme would cost anywhere around $50. That sucks! Writing posts on web interface is another headache. I like to write my posts in a text editor like Brackets, Sublime or Atom. Maybe it is the aesthetically pleasing ![]() design that makes me stick to these apps.
design that makes me stick to these apps.
Jekyll was perfect for me because it is very minimal, content-oriented and super fast. Jekyll converts your content(posts and pages) written in markdown into static web pages. I personally like markdown format because it is easy, reader-friendly, and doesn’t look like a bunch of confusing html code.
Reasons to use Jekyll
1. Minimal
This is the main reason why I was dragged into Jekyll. It feels good to read a blog with minimum distractions.
2. Fast
Before I knew Jekyll, I used to find these links on google search results with the website extension .io which used to be minimal and load super fast. I always wondered how do they create such websites (now I know!).
3. Secure
Since there is no database, most of the security threats are halted right there. No wonder why obama campaign website was created using Jekyll.
4. Economic
If you use Github for hosting your Jekyll blog then your expense on hosting would be zero! Also, hosting static websites is really cheap in third-party hosting services.
If you would like to learn how to host a website on GitHub first then read: How to host a website on github pages.
Why not WordPress?
WordPress is the most famous CMS by the time I’m writing this article. WordPress is convenient if you are not good at coding. You can find plugins for every single functionality. But you will soon realize that the blog becomes slower and slower upon adding plugins. As per my observation, WordPress adds a lot of code for a simple function.
Also for this blog, a minimalistic WordPress theme would have done the job, but I wanted something that can load faster. I found Jekyll at the right time. Jekyll being a static-site generator - is a lot faster and very secure. It uses few templates over and over on all the posts and pages which make the designing part sleek. If you are a web designer then you can make your own design like how I did with my blog.
What if you are not a designer? Don’t worry, there are plenty of pre-built themes available for Jekyll. For all these goodness, I have moved all my blogs to Jekyll!
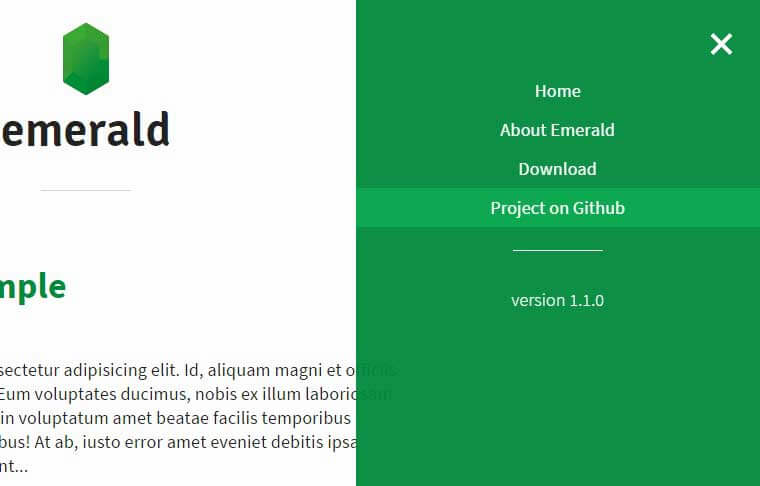
Let’s create a simple blog in 5 minutes! The output would look like this : redgadget. This blog has a nice sliding navigation bar, a minimal footer and content focussed main page design. Though the blog has a green color scheme, it can be changed to any color you like.
Prerequisites
![]() Github Account
Github Account
![]() A Little Patience
A Little Patience
Create a free account on Github. Github account is required because we are hosting the blog on Github. You can also host on other hostings like Amazon AWS, CloudCannon but it is better to start with a Version Control System like Github.
Have a little patience to understand how it works. Many times (at least in my case ![]() ), you do not get the output you were looking for. There is a reason for that. Go through the error message. Copy the whole error message to google search to see whether other people have faced the same issue before. I have solved many issues I had with this method.
), you do not get the output you were looking for. There is a reason for that. Go through the error message. Copy the whole error message to google search to see whether other people have faced the same issue before. I have solved many issues I had with this method.
Github documentation is good but it uses technical terms that a normal user is not aware of. If you want a guide for github then here it is - Github Guide. Let’s begin creating a Jekyll blog.
Step 1: Find a theme that suits your requirement
A theme is important for a good looking blog. Otherwise, you can go with the basic Jekyll theme if you would like to design it all by yourself. But if you are looking for a pre-designed layout then you should search for Jekyll Themes. You will find a lot of themes but, what I suggest for starters is to go with these Jekyll themes.
These are some pretty well-built themes that I recommend. You can change the look and scheme as you wish (a little coding knowledge is required). Let’s take a look at how to implement Emerald theme.
All the themes you see are inside a certain repository. You just have to copy these files and change it accordingly to make it yours (but keep the license file as it is). So if you look at Emerald theme, it has a link in its navigation which says Project on Github. That link will lead you to the theme repository.
Once you are inside the repository move to next step.
Step 2: Fork - A new way of copy pasting!
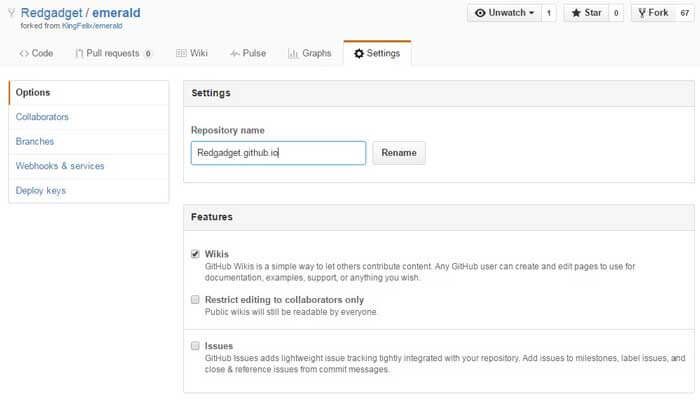
First thing is logging into Github account and forking the whole theme repository
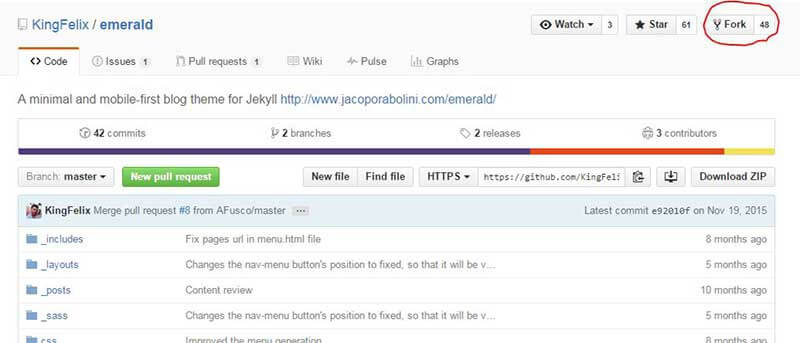
What fork does is that it copies the whole repository as a new repository inside your Github account. You can rename the repository to anything you like in the Settings option.
Step 3: Check whether you are on the right branch
Branching in Github is nothing but taking the whole source code and make changes to test a different feature. There is always a master branch from which you can make many branches. One such branch is gh-pages. Github considers the code to be a website, only if it is in the gh-pages branch.
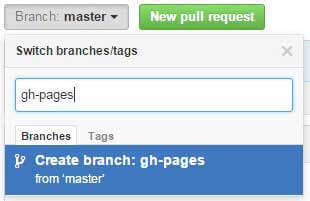
So once you fork the repository, make sure you are in the gh-pages branch. If not then create a branch with the name gh-pages. Many themes tend to have only the master branch. So it is necessary to create a gh-pages branch to host the blog as a Project Page
Step 4: Check for redirection
Once you hit the fork button, all the files in the remote repository will be copied to a new repository in your Github account.
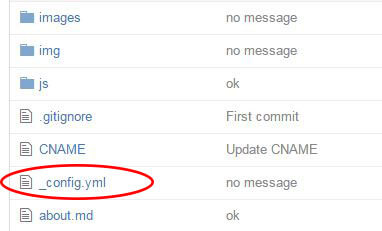
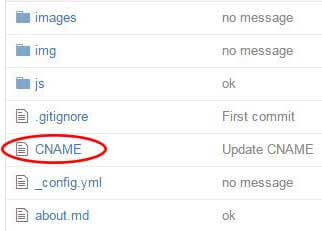 Now, navigate to the repository and check whether it has any CNAME file inside it. CNAME is used for custom domains, which is not really required for this tutorial.
If there is one, then delete the URL inside it and commit. If there isn’t one, then no problem.
Check the URL https://username.github.io/emerald change the username to your Github user name.
Your blog should be up and running by now. But give it some time. A maximum of 10 minutes. Jekyll builds a static blog in the meanwhile. If the blog is not up, then take the next step.
Step 5: Check for baseurl
 If your blog is showing a 404 error, then you may have to check the baseurl in configuration file.
Jekyll blog configuration is found inside _config.yml file.
If your blog is showing a 404 error, then you may have to check the baseurl in configuration file.
Jekyll blog configuration is found inside _config.yml file.
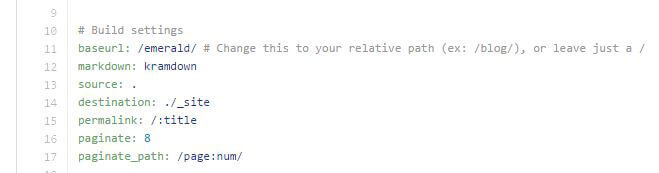
Open the file to see what is the baseurl configured. Usually it is /emerald/ for emerald theme.
If (only if) you have renamed the repository name to something like blog or app, change the baseurl as shown below.
baseurl: /blog/
baseurl: /app/
Your blog will show up in the particular website
https://github.username/blog/ or https://github.username/something/
So that’s all there is to set up a new Jekyll blog. Some things like CNAME and baseurl may vary from theme to theme. But once you have a good knowledge of why they are used, you can configure them as you like.
Step 6: Make changes to your website
The theme you forked will have default values that you can change at different places of the repository files. But most of the configuration will be present inside _config.yml file. Edit the file as per your requirement.
Go through all the folders like images, _posts, _includes, _layout etc, to make changes that you want. Most of these are plug and play but title and logo must be changed before you host your blog to the public.
Editing files on github.com is actually hard. For easier editing use prose.
Step 7: Publish your new post!
Usually, themes will have some sample posts in the _posts folder already. Posts are in .md format which stands for markdown. Markdown is an easy-to-read and easy-to-write format which will ultimately be converted into html after processing.
You can edit the posts that are already present or you can also create a new file with the extension .md and name in the format YYYY-MM-DD-title.md. Use Markdown Cheatsheet while writing posts.
Front Matter
The front matter is a block of key-value pair that exist at the top of a post or a page. It is declared in between triple dashed lines. This is where you can provide the title, layout, permalink(preferred URL) and more to a post or a page.
Here is the front matter for this post.
---
layout: post
title: How to Create a Beautiful Jekyll Blog?
description: I created this beautiful looking Jekyll blog using default Jekyll template. You can also do this or fork a theme to make it yours. Jekyll is a simple blog generator. The community is growing and the number of plugins is also growing. Learn how to create Jekyll blog.
tags: Jekyll Web-Design
permalink: /create-jekyll-blog/
---
If you want to start writing posts then read: How to edit Jekyll posts
This is how we host a project website or blog. In github, we have two types of hosting - User Pages and Project Pages. The method described above is Project Pages.
Pro Tips
You can use any number of Project Pages in a github account. A repository should be kept under 1GB. Which means a Project Page should not exceed 1GB. Also, it should not contain a file of size exceeding 100MB. Read Disk Quota
Here is a table for better understanding of User Pages and Project Pages.
| Type of GitHub Pages site | Domain/Host location | Publishing branch |
|---|---|---|
| User Pages | username.github.io | master |
| Project Pages | username.github.io/projectname | gh-pages |
How to host a Jekyll blog on User Pages?
User Pages is meant to host a personal website. Maybe a portfolio, resume or a showcase of your work. There can be many Project pages but there should be only one User Page which can be accessed at the address http://username.github.io.
To create Jekyll blog on User Pages, you should follow the same steps till Step 4 which is finding a theme, forking the repository and checking for redirection.
Now, go to Settings and rename the repository as username.github.io where username is your Github username.
Now you can access this blog by accessing the URL http://username.github.io. Replace the username with your GitHub user-name.
Warning
You can only use your own account name for a User Page repository. So there can be only one User Page per github account.
Developing Jekyll Locally
There are many advantages when you blog locally and push changes to the server. But, you will have to install Ruby and some RubyGems on your desktop in order make everything work.
Advantages
1. Use your favorite editor: I like to write posts on Brackets or Sublime Text. Writing on a local editor is better than on a browser because these editors are fast and can save the files locally at any moment.
2. No internet is required: Since we are writing posts locally, no internet is required until the time we have to post to the server. This is good for someone like me who is living in a small town and have an unreliable internet connection.
3. See the changes before implementing: When you are editing Jekyll blog locally, you can make changes and see how it renders on a browser. This is really useful when you are creating a new menu bar, button, or a layout where you have to change things very often before settling on the final version.
What do you need to run Jekyll locally?
As I said in the introduction, Jekyll is written in Ruby. So you should have Ruby installed on your computer. And you will also be using some Ruby gems like Jekyll(obviously), pagination, jemoji etc., Gems add certain functionality to your Jekyll blog.
Pagination used to be included in Jekyll but, after Jekyll 3.0 it is no more included. You have to manually install pagination gem.
1. Install Ruby - Download links
2. Install Gems
Jekyll: gem install jekyll
Pagination: gem install pagination
Now your computer is ready to install Jekyll. Make a folder on your computer with any name you wish, say Project.
-
Open the command line and navigate to the folder Project.
-
Enter the following command
jekyll new new-jekyll-blog. Use any name in place of new-jekyll-blog. This command will create a folder named new-jekyll-blog and place default Jekyll site inside it. The folder structure will look somewhat like this. You may not have all the files but you will have all the necessary files.
.
.
├── _config.yml
├── _drafts
|   ├── begin-with-the-crazy-ideas.textile
|   └── on-simplicity-in-technology.markdown
├── _includes
|   ├── footer.html
|   └── header.html
├── _layouts
|   ├── default.html
|   └── post.html
├── _posts
|   ├── 2007-10-29-why-every-programmer-should-play-nethack.textile
|   └── 2009-04-26-barcamp-boston-4-roundup.textile
├── _data
|   └── members.yml
├── _site
├── .jekyll-metadata
└── index.html
-
Enter
cd new-jekyll-blogto navigate inside the Jekyll site. -
Enter
jekyll serveto serve it locally so that you can browse the blog through a browser. Your blog will be available onhttp://localhost:4000by default.
You can make any changes you like to the Jekyll site. Jekyll polls for any changes that you make. It may take a few seconds depending on the size and complexity of your blog. For a faster build, use jekyll serve --incremental which polls only for changed files. Use it with caution since it is has some problems.
This is how I created my Jekyll blog. Once you are done designing your blog, you should push these changes to a repository. To learn how to push changes to Github, read: How to sync files and folders to Github.
Conclusion
There are many things that you can do over Jekyll but there are limitations as well. Since the blog is static, there is no server side execution possible. So your contact form which uses a php file may not work in Jekyll.
I suggest you to try Jekyll and see if you can get all the functionalities you wanted in your blog. Initially, I was skeptical about podcasting on Jekyll but today I have a podcast successfully hosted using Jekyll.
Follow this blog to know what you can do with your Jekyll blog. I try to cover many critical requirements like a contact form, subscribe option etc.,
To know more about Jekyll, read: A layman’s guide to Jekyll.
If you have any doubts or if you couldn’t set up your Jekyll blog then please leave your question in the comments. I will try to sort it out for you.
Here is a video demonstration on how to create Jekyll blog. And, once you create a blog, don’t forget to leave its link, in the comment section.
Thanks for reading!
